Keep It Boho

I just LOVE summer! And what a relief that so far we have not had our traditional rainy weather. I don't know about you, but i just love knowing that i can light the BBQ and invite my friends and family round for a few gins and a good old chat. And this new range, Boho Mix, is just a perfect addition to compliment the sunny weather that is outside. With lots of bright colours, patterns and images, i just LOVE this and have to share it with you all.
 Boho Festival Tableware
 Boho Napkins and Cups
 Personalised Poster
 Boho Festival Banner
 Boho Pom Pom Chandelier
 Boho Mix Bunting
 Cuban Fiesta Paper Lanterns - Pack Of 3
 Boho Pom Pom Lights
How to make your very own Pom Poms:
Boho Pom Pom Lights
How to make your very own Pom Poms:

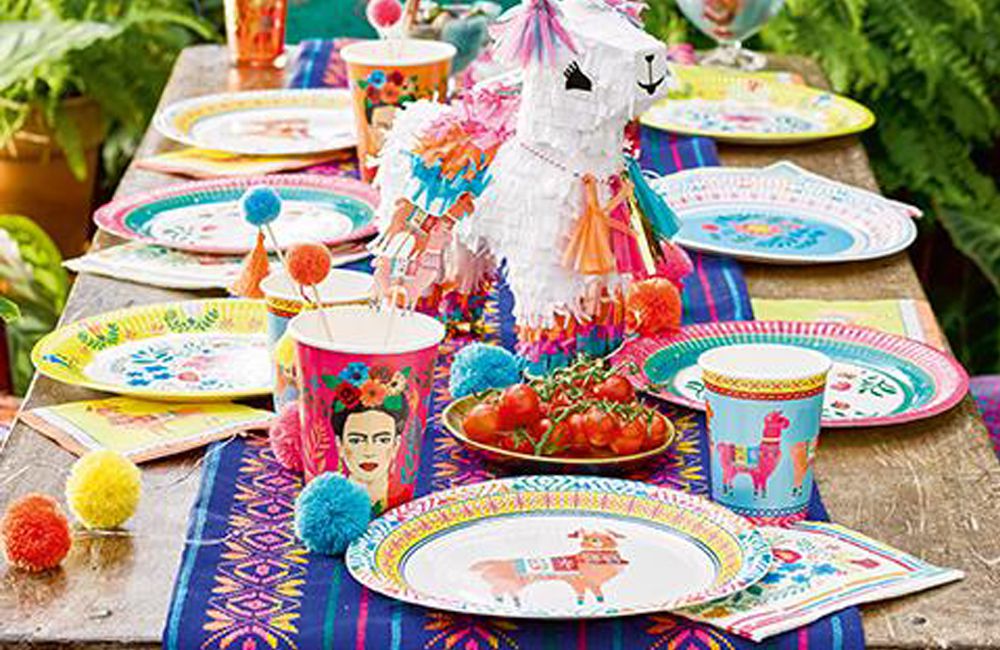
Tableware
I mean look at how gorgeous this range looks when it is put together. Mix and match patterns and colours to get the ultimate Boho vibe. An easy way of creating this look is to simply dig around your house! Dotting different patterned cushions on the chairs outside, or even using a funky table runner in bright colours will help to achieve this style. Boho Festival Tableware
Boho Napkins and Cups
Personalised Products
Give that personal touch with these gorgeous banners and posters. Delicately designed by our very own Maxine here at Party Packs. I just love floral patterns and tribal for that matter. The combination just works! And with the rainbow array of colours, this is sure to look truly stunning. Personalised Poster
Boho Festival Banner
We LOVE Pom Poms
Pom Poms are a must when trying to get the Boho look. All of these decorations are in bright colours with Pom Poms everywhere!I mean, pom poms are the easiest thing ever to make! Take a look at the end of the Blog to see how: Boho Pom Pom Chandelier
Boho Mix Bunting
Cuban Fiesta Paper Lanterns - Pack Of 3
Boho Pom Pom Lights
How to make your very own Pom Poms:
- Cut out two cardboard circles and then cut a small wedge and hole in the middle so that your disks look like they have keyholes.
- Start to wrap the wool between the two pieces of cardboard circles.
- Keep winding the wool around the two circles. You can aim to wrap it around about 100 times or until you reach the correct size that you want.
- Get some scissors and cut between the two circles. Make sure to go slowly and cut evenly.
- Now get a piece of wool around 10cm long and wrap it between the two pieces of card! Wrap a few times and tie in a knot to secure your Pom Pom.
- Gently remove the card from your Pom Pom and begin to trim the wool to create a gorgeous round fluffy ball.
- And there you have it! A Pom Pom that can be used however you like... Maybe use it to make a bookmark or even hang them up and make a Pom Pom chandelier.